Chive Blossom Vinegar Recipe
Chives are one of our favorite and easiest herbs to grow, and we think everyone should grow them In their gardens! They are perennial, which means that they come back on their own every year, and are one of the first plants to pop up in early spring. In our climate, our winters are generally mild enough that they overwinter, meaning we can harvest from them ALL YEAR LONG.
Not only do we love chives from a culinary standpoint, but they're a great companion plant for basically all plants, deterring unwanted pests. And, when they blossom, thee bees just LOVE those blossoms! We always try to find ways to welcome pollinators into the garden and chives are an easy add since you plant it once and never have to add it again.
Our chives are a few years old right now and the last month or so, they have been bursting with blossoms! We decided to try using the blossoms (while leaving some intact for the bees), and have seen recipes over the years for chive blossom vinegar.
First of all, take a look at all of these adorable blossoms!

Chives fill in any space so nice and those blossoms are just so fluffy and adorable!! We just love this burst of color in early Spring! Well let's be honest, we love this burst of color during all of the seasons!

These are common chives, so the blossoms and the tube-like stems have a very mild onion flavor. Fresh chives can be chopped up & added to salads, compound butters (this is Jess' absolute favorite way to use herbs, especially chives - we'll post another recipe on chive butter soon!), baked potatoes, scrambled eggs, the list goes on.
It's best to chop them up when using raw. You can use household scissors, or a really sharp knife, but we LOVE using herb scissors - if you don't already have a pair, we highly recommend these on Amazon, it's what we have in our own kitchen and honestly, a huge game changer when you're chopping fresh herbs from your garden (or the store, wherever you source your fresh herbs).
As an Amazon Associate we earn from qualifying purchases.
This page contains affiliate links. If you choose to purchase after clicking a link, I may receive a commission at no extra cost to you.”
SInce we wanted to leave blossoms intact for the bees, we harvested maybe half of our blossoms. AND the stems. Because compound butter!

You don't have to remove the stems when harvesting the blossoms - just removing the flowers is commonly referred to as deadheading (although this is typically done after the flower has turned brown and dried up).
Note on pruning chives: there's no precise way to do it. Chives are pretty forgiving and will grow back regardless! If you are simply removing the flowers, you can just pluck them off with your hands, no pruners needed.
Ok, let's get to the recipe!!
Obviously, this recipe is not ours exclusively. You can find another one just like it on Pinterest, or variations just like it. But the purpose of us sharing is that we are using herbs from our garden, and we want to share with you how we take them from garden to table, so you can too! Now let's get to the good stuff.
First off, collect your chive blossoms and separate the flowers from the stalks. You will probably want to run your flowers under the sink real quick, just to make sure no bugs are hiding in the depths.
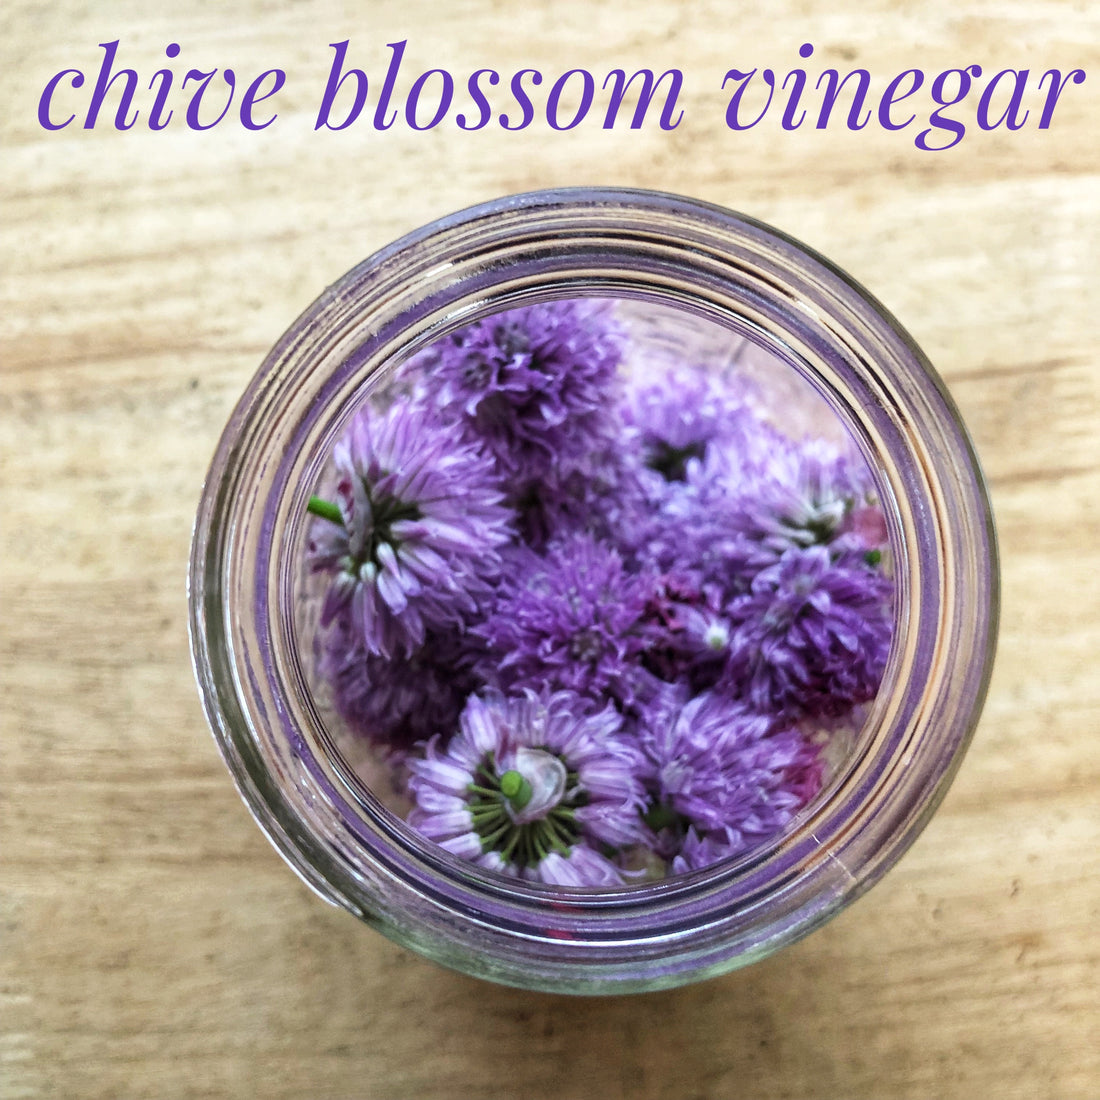
Fill a glass jar about halfway full with blossoms (any size will work, it just depends on how many blossoms you have). We like using mason jars or repurposing old spaghetti sauce jars, anything that had a former life in our pantry and still has a lid!
Add white vinegar to the jar and fill to the top of the jar, make sure your chive blossoms are completely covered. Tighten the lid on and let sit for 1-2 weeks in a cool dark place (like in a cabinet). Storing in the dark helps to prevent rancidity. Here's what our vinegar looks like before it starts its 14 day infusion.

When finished infusing, your vinegar should be a pretty shade of pink or purple. Strain out the chive blossoms, put your lid back on and store in a cool, dark place.
You can compost your spent chive blossoms or use them for something else, totally up to you.
So now that you've got chive blossom vinegar on hand, what are you going to make with it? We've got a few suggestions :)
HOW TO USE CHIVE BLOSSOM VINEGAR
- Make a salad dressing out of it! Swap it into your favorite vinegar based dressing recipe.
- Make a reduction sauce to drizzle over roasted veggies or meat.
- Use this instead of white vinegar when making deviled eggs!
Chive Blossom VinegarPrep Time: 5 minutes Ingredients 1 handful chive blossoms Instructions
Chive Blossom Vinegar can be kept on the counter (or in a cabinet), but it will last longer if stored in the fridge, anywhere from 6 months to 1 year. |
And that's a wrap! We'd love to know what's your favorite way to use it! Add in the comments below or tag us (@pnwgardengirls) in your IG post/story!